Hip pain in runners can be a common occurrence and can be very disruptive to participating in running. Commonly pain symptoms are experienced on the outside hip and gluteal area but can also affect the front of the hip and groin area too.
In this article we briefly discuss some of the common pathologies and injuries that can cause hip pain in runners with some broad stroke ideas on how to try and improve hip health to improve your running performance, with a focus on injuries that tend to cause pain on the outside of the hip.

Greater Trochanteric Pain Syndrome
Greater Trochanteric Pain Syndrome (GTPS) is a bit of a mouthful, but it is essentially a general term that describes pain and dysfunction around the bony bit on the side of your hip. This bony bit is called the Greater Trochanter and as suggested it is a bony prominence that serves to function as an attachment point for various muscles that control the hip. One of these muscles is the gluteus medius muscle which is a prominent player in both cause of the pathology and the pain experienced during GTPS.
The two most seen components of GTPS are a glute medius tendinopathy and bursitis. A tendinopathy means that there is dysfunction in the tendon which can be several things including the tendon becoming disorganised in shape, having more water and inflammatory cells in it and reduced ability to cope with exercise. A bursitis means that the fluid filled sac (called a bursa) that sits over the greater trochanter has become inflamed and swollen. Often an inability to lie on your side for any length of time is an indication of a bursitis.
ITB Syndrome
Hip Impingement
Back Pain
Sometimes where the pain is, is not where the injury is. A commonly heard term is sciatica. Whilst this used to be a more formal diagnosis, the term mainly means that someone is experiencing pain in the leg or legs that stems from the back. Commonly this is linked to nerve pain but it is also possible that joint pain in the lower back can cause pain to refer into the buttocks, outside or front of the hip and thigh.
Load Correctly
When it comes to exercise and training there are lots of terms thrown around and one common one is this idea of “loading”. Really what this means is exposing the body or a particular structure to effort through exercise. Then we have “volume” which refers to the amount of loading you do in a set time frame. And “frequency” is the number of times in a set time frame you load.
Within this concept of loading, especially when you are thinking about training i.e. carrying out a training programme or rehabilitating from an injury, it is useful to consider two time frames 1) how much loading you are doing over the course of a week (a micro cycle) and 2) how much loading you are doing over the course of a month (meso cycle).
The amount of loading you do over the course of one week is considered the acute workload and is considered as measure of fatigue (i.e. a negative value). The amount of loading conducted over the course of four weeks is considered the chronic workload which is measure of fitness (i.e. a positive value). *SPOILER ALERT* There is some maths incoming, but please stay with me, its not as bad as you might think. First though we need to be familiar with the Rate of Perceived Exertion (RPE) tool which helps gauge how difficult we find an exercise or a workout. The RPE tool is shown below:
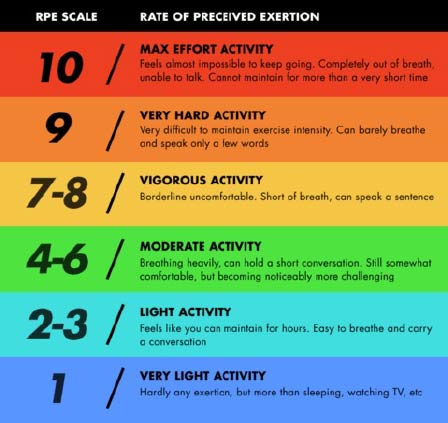
- Step 1 – rate your training session according to the RPE scale
- Step 2 – Multiply the RPE score by the duration of the training session i.e. RPE is 6 and you train for 60 minutes = 360 Arbitrary Units (AU)
- Step 3 – repeat steps 1 and 2 for all training sessions over a 7 day period and add values together to give you the total AU for that week
- Step 4 – having collected this data for four weeks you will have four values of which you then add together and divide by 4 to give you CHRONIC workload value i.e.
– Week 1 = 1000 AU
– Week 2 = 1300 AU
– Week 3 = 1100 AU
– Week 4 = 1500 AU 4900 AU / 4 = 1225 AU - Step 5 – now we take the AU of week 4 (the acute workload) and divide it by the chronic workload. So in this case:
– 1500AU / 1225AU = 1.22
– So we have our acute : chronic work ratio of 1.22
Now it does get a bit more complicated but for simplicity we’ll stop here. This gives you a guide and allows you to track how much load you’re doing and whether you are putting yourself at risk of unnecessary and unwanted injuries through under or over training.
Key Exercises to include
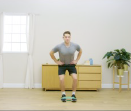
Although the following exercises are not an exhaustive list of exercises you can use to address glute medius weakness or pathology, nor a comprehensive list of exercises for hip health, they have all been shown to generate high levels of muscle recruitment and therefore are specific to this muscle. Training the muscle in a variety of ways and positions helps to build a more resilient muscle.
If you are experiencing pain symptoms it is always best to seek the advice of a clinician in order to get a tailored rehab plan based on your specific situation.
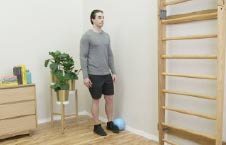
Isometric standing hip abduction
Single leg bridge
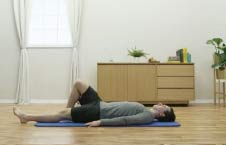
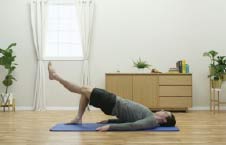
Push the heel of the bent knee down into the floor and lift your hips up into the air until you create a straight line with your body. Make sure the hip of the straight leg isn’t dropping. Hold this position for 5 seconds and then slowly lower your hips back to the floor. Repeat.
Side lying hip abduction
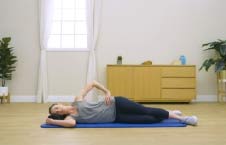
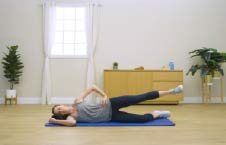
Resisted side steps
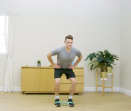
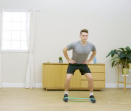
Summary
References
1. Gabbett TJ. The training-injury prevention paradox: should athletes be training smarter and harder?
Br J Sports Med. 2016;50(5):273-80.

